It's a familiar scenario for many: you've carefully built your automated system, eagerly anticipating a steady stream of resources, only to be met with a frustrating hiccup. Nothing grinds a crafting session to a halt quite like a cobblestone generator that suddenly refuses to cooperate. Whether it's a sputtering start, inconsistent output, or a complete standstill, Troubleshooting Common Cobblestone Generator Problems can be a head-scratcher. But don't fret – with a little know-how, you can diagnose and fix most issues, getting your block factory back to peak production.
This guide is for anyone who relies on these essential machines, from survivalists to creative builders. We'll demystify the common culprits behind generator woes and walk you through actionable solutions. Think of it as your field manual to reliable power and endless blocks.
At a Glance: Quick Fixes & Key Takeaways
- No Start? Check fuel (old, clogged), spark plug (fouled), or battery (dead). Over 50% of no-starts are fuel-related.
- Running Poorly? Erratic surging usually points to a clogged carburetor (tiny jets!) or a misbehaving governor.
- Power Problems? If it runs but output is unstable, look at voltage regulation (AVR) or worn alternator brushes.
- Safety First: Always disconnect power (remove spark plug wire) and allow cooling before working on any component.
- Preventive Maintenance is King: 65% of failures are due to overlooked maintenance. Regular checks save headaches.
- Documentation Helps: Keep a log of maintenance for easier troubleshooting and better resale value.
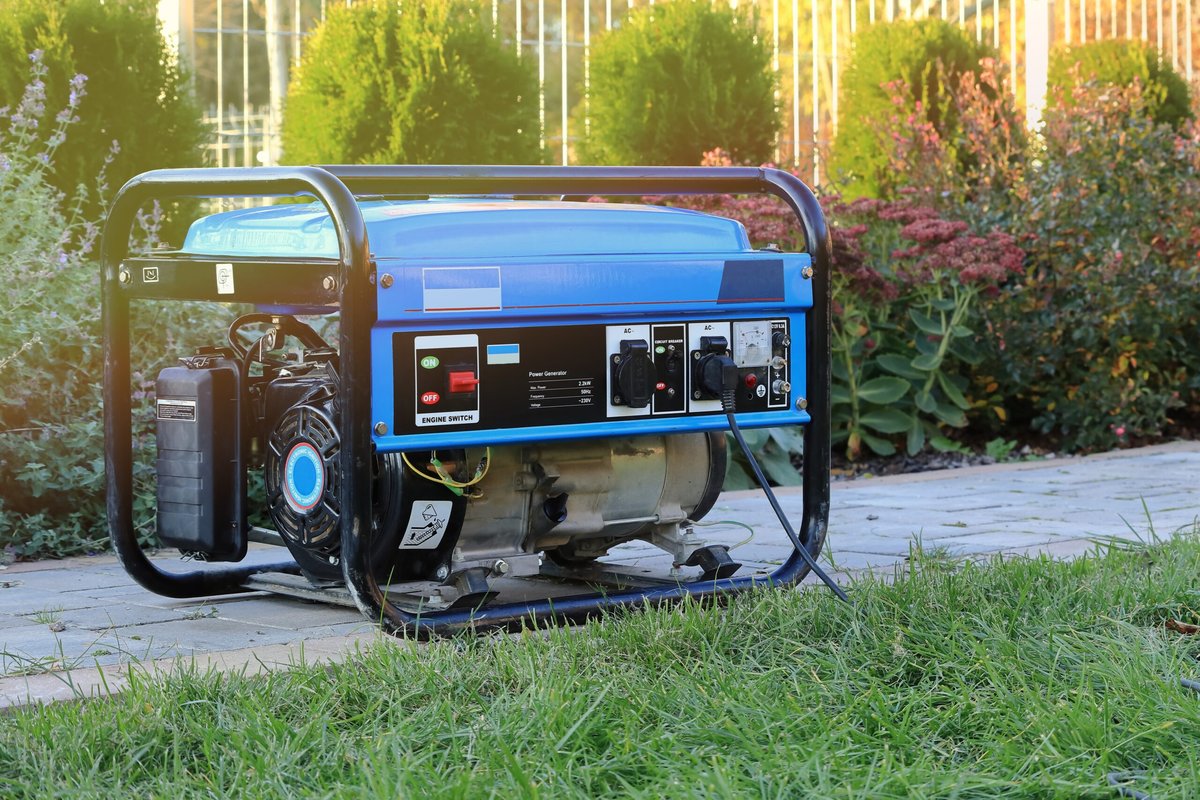
Understanding Your Cobblestone Generator: The Basics
Before diving into repairs, a quick refresher on how these machines work can be incredibly helpful. At its heart, a cobblestone generator (the real-world equivalent we're discussing here being a portable power generator) transforms fuel into mechanical energy, then into electrical energy. This process relies on a delicate balance of air, fuel, and spark in the engine, and precise electrical regulation for stable output. When any part of this system falters, your reliable block output can quickly turn into a frustrating puzzle.
Studies show that a staggering 90% of generator failures are preventable, with 65% stemming directly from maintenance oversights. That's why understanding these machines isn't just about fixing them when they break, but keeping them running smoothly in the first place. For those just starting out, learning how to make a cobble generator is a foundational step, and this guide builds on that by helping you maintain your creation.
Problem 1: Your Generator Won't Start – The Dreaded Silence
This is arguably the most common and frustrating problem. Your generator just clicks, cranks, or remains stubbornly silent. The core issue almost always boils down to a lack of sufficient air, fuel, or spark.
The Fuel System Follies (The Usual Suspect)
More than half of no-start situations are traced back to fuel problems.
- Old or Bad Fuel: Gasoline degrades quickly, often within 30 days, forming varnish that clogs tiny carburetor passages. Ethanol-blended fuels are particularly problematic as they attract moisture, leading to "phase separation" where water and ethanol separate from the gasoline, causing corrosion. For diesel generators, cold weather can cause fuel to gel, preventing flow.
- The Fix: Drain any old fuel from the tank and carburetor. Clean the tank if you see sludge or rust. For clogged carburetors, a dedicated cleaner like Berryman B-12 can dissolve varnish. For diesel, add anti-gel additives in winter months.
- Prevention is Key: Always use a fuel stabilizer (e.g., Sta-Bil) if storing the generator for more than a month. Better yet, run the generator completely dry before long-term storage to prevent fuel degradation.
The Spark Plug Snags
Without a strong spark, your fuel-air mixture won't ignite.
- Fouled or Damaged Plug: Spark plugs can become fouled with black, oily deposits (rich mixture, burning oil) or white, blistered electrodes (overheating, lean mixture). Broken porcelain also renders them useless.
- The Test: Carefully remove the spark plug. Connect the spark plug wire, then ground the plug's metal body against a clean, unpainted part of the engine block. Pull the starter cord (or briefly engage electric start). You should see a strong, blue spark. No spark indicates a faulty plug or ignition coil.
- The Fix: Replace the spark plug. It's an inexpensive component and a common fix. Always use the manufacturer-recommended type (e.g., NGK BPR6ES is common for small engines) and gap it correctly.
Battery Blues (Electric-Start Models)
If your generator has an electric start and just clicks, or doesn't respond at all, the battery is a prime suspect.
- Dead Battery: Many generators have safety cutoffs that prevent starting, even with a manual recoil, if the battery is dead.
- Checks:
- Voltage: Use a multimeter to check battery voltage. A healthy 12V lead-acid battery should read 12.6V or higher.
- Terminals: Inspect for corrosion. Clean fuzzy, green deposits with a baking soda and water paste and a wire brush.
- Load Test: A battery might show good voltage but fail under load. A local auto parts store can perform a free load test.
- The Fix: Recharge or replace the battery. Ensure connections are clean and tight.
Low Oil Level & Safety Switches
Most modern generators include a low-oil shutdown sensor to protect the engine from catastrophic damage.
- Insufficient Oil: If the oil level drops below the minimum mark, the sensor will prevent the engine from starting or running.
- Check: Use the dipstick to verify the oil level. Ensure you're using the correct viscosity (e.g., SAE 10W-30 for most temperatures).
- Contamination: Milky oil indicates water or coolant leakage, which requires immediate professional attention.
- The Fix: Top up the oil to the correct level. If contaminated, drain and replace, then investigate the source of the contamination.
Mechanical Hiccups (When It Won't Even Turn Over)
If you pull the starter cord and it feels stuck, or the electric starter just grinds without spinning the engine, you might have a mechanical issue.
- Recoil Starter: For manual start, inspect the recoil mechanism. A broken spring or seized internal components can prevent the cord from pulling.
- Electric Starter: For electric start, beyond the battery, check the starter solenoid and its wiring. A clicking solenoid without engine engagement suggests either a dead battery or a faulty solenoid.
Problem 2: Your Generator Starts But Runs Erratically – Surging, Sputtering, Fluctuating Power
A generator that sounds like it's taking a deep breath, struggling, or changing its pitch erratically is often suffering from an imbalance in its fuel-air mixture or a mechanical component that isn't moving smoothly.
Carburetor Troubles (The Tiny Villains)
This is the culprit in 90% of issues with carbureted generators running erratically.
- Clogged Jets: Carburetors have incredibly tiny jets, some as small as 0.015 inches, designed to precisely meter fuel. These can easily clog with micro-debris from degraded fuel lines, varnish from old fuel, or even water contamination. This disrupts the ideal fuel-air ratio.
- The Fix (Carburetor Cleaning):
- Removal: Carefully remove the carburetor (usually 3-5 bolts) and disconnect fuel lines. Take photos to remember how everything connects.
- Disassembly: Remove the float bowl and float. Remove all jets and small components.
- Soak: Soak all metal components (not rubber or plastic) in a dedicated carburetor cleaner like Berryman Chem-Dip for about 30 minutes.
- Blow Out: Use compressed air (less than 30 PSI to avoid damaging small parts) to blow out all passages, especially the tiny jets. Ensure you can see light through them.
- Reassemble: Reinstall with new gaskets if available, especially the float bowl gasket.
- Tip: Consider a carburetor rebuild kit if worn parts are suspected.
Governor System Malfunctions
The governor system is crucial for maintaining a constant engine speed (and thus consistent electrical frequency) regardless of the load.
- Sticky Governor Arms: If the pivot points are gummed up, the governor can't respond quickly.
- The Fix: Clean pivot points with a penetrating lubricant like WD-40 Specialist Lubricant, then re-lubricate.
- Worn Throttle Shaft Bushings: These can cause air leaks, leading to a lean mixture and erratic running.
- The Fix: This typically requires replacement of the carburetor or the entire engine assembly, depending on the design.
- Broken Governor Springs: Without proper spring tension, the governor won't regulate speed effectively.
- The Fix: Replace the broken spring.
- Adjustment (Honda EU Series Example): Some generators, like the Honda EU series, have a governor sensitivity screw under the control panel. If surging, try turning it clockwise in 1/8 increments to reduce the surging until stable.
Load-Related Surging
Sometimes, the generator itself isn't faulty, but it's being asked to do too much.
- Undersized Generator or Overloading: A generator needs to maintain a consistent frequency (60Hz in North America) regardless of the load. If the load exceeds its capacity, or if multiple heavy devices start simultaneously, the engine will struggle.
- The Fix: Check your generator's rated watts vs. surge watts. Balance loads between circuits. For large motor loads (like air conditioners), consider installing a soft-start capacitor, which reduces the initial power draw.
- Other Checks:
- Valve Clearances: Incorrect valve lash (too tight or too loose) can cause hard starting and power loss. Check and adjust clearances (typically 0.003-0.005″ for intake, 0.005-0.007″ for exhaust on small engines) using feeler gauges.
- Sheared Flywheel Key: This small key aligns the flywheel with the crankshaft. If it shears (often from a sudden impact), it can throw off ignition timing, causing erratic running or failure to start. Replace the key if sheared.
Problem 3: Your Generator Runs Smoothly But Fails to Deliver Stable Electricity
This is often an electrical system fault. The engine sounds fine, but your devices aren't getting consistent, reliable power.
Voltage Fluctuations – Too High, Too Low, or Inconsistent
Your generator should produce voltage within an acceptable range, typically ±10% of rated voltage (108-132V for a 120V system).
- Low Voltage Under Load: Often caused by worn brushes in the alternator. Brushes wear down over time and may not make good contact with the slip rings.
- The Fix: Measure brush length (new brushes are typically >1/2″). Replace the brush set if worn (e.g., Generac 0J837701SRV for specific models).
- Spiking Voltage (High): Usually indicates a faulty Automatic Voltage Regulator (AVR). The AVR is responsible for maintaining a stable output voltage.
- The Test: Use a multimeter to measure output voltage with and without a load. If it spikes or is consistently high, the AVR is likely bad.
- The Fix: Replace the AVR. Ensure you match the OEM specifications for your generator model.
- Intermittent Power: This can be a sign of loose stator windings within the alternator.
- The Test: Perform an Ohm test between the stator windings (should be 0.2-0.5Ω). Significant variations or an open circuit indicate an issue.
- The Fix: This often requires professional rewinding or replacement of the stator.
Frequency Instability (Hz Out of Whack)
Engine speed directly dictates the frequency (Hz) of your generator's output. A deviation of more than 5% (e.g., below 57Hz or above 63Hz) can damage sensitive electronics and motors.
- Diagnosis: Use a Kill-A-Watt meter or a multimeter with a frequency function. Expect 61-62Hz at no load, and never below 58Hz under full load.
- Inverter Generators: If you have an inverter generator, frequency problems often point to failed MOSFETs in the power module. These are complex electronic components.
- Example: Honda EU2200i power modules are known to fail after 3,000+ hours of use, typically requiring a replacement module.
- General Electrical Tip: A surprising 40% of "failed alternator" diagnoses turn out to be corroded connections. Before replacing expensive components, thoroughly clean all terminals with an electrical contact cleaner like DeoxIT D5. Dielectric grease on connectors can prevent future corrosion.
Problem 4: Your Generator is Leaking Gas – A Safety Hazard!
Any fuel leak is a serious safety concern due to fire risk and harmful fumes. Address these immediately.
- Likely Leak Points:
- Carburetor: The float bowl gasket can fail, or internal components can stick, causing an overflow.
- Fuel Filter: Old or improperly seated filters can leak.
- Fuel Lines: Cracks, loose clamps, or perished rubber lines are common.
- Fuel Shut-off Valve: The valve itself can fail, or its connections can loosen.
- Fuel Tank: Rust, cracks, or a loose fuel cap gasket.
- The Fix: Visually inspect all these areas. Replace any cracked lines, tighten clamps, replace gaskets, and repair or replace tanks as needed. Always use fuel-rated hoses and clamps.
Problem 5: Your Generator Bogs Down Under Load – Losing Power When It Matters
When your generator can run fine with a light load, but struggles, slows, or even dies when you connect heavier appliances, it's typically an issue with fuel or air delivery, or simply exceeding its capacity.
- Air Restriction: A clogged air filter will starve the engine of oxygen.
- The Fix: Clean or replace the air filter.
- Fuel Restriction: A partially clogged fuel filter or fuel line, or a dirty carburetor jet (as discussed in Problem 2), can't supply enough fuel under demand.
- The Fix: Check and replace the fuel filter, inspect fuel lines, and clean the carburetor.
- Overloading: The most straightforward cause. Your generator simply isn't powerful enough for the combined draw of your devices.
- The Fix: Ensure your total connected load does not exceed your generator's continuous running wattage. Remember that motor-driven appliances (refrigerators, power tools) have a much higher "surge" wattage when they start up.
Regular Maintenance: Your Generator's Lifeline
Preventive maintenance is the single most effective way to avoid these frustrating problems. Stick to a schedule, and your generator will serve you reliably for years.
Essential Maintenance Schedule (Whichever Comes First)
- Every 50 Hours / 3 Months:
- Check Oil Level and Condition: Top up or change if dark, milky (indicating water), or smells burnt.
- Inspect Air Filter: Clean or replace if dirty. A clogged filter chokes the engine.
- Test Battery Voltage: For electric-start models, ensure 12.6V minimum for lead-acid.
- Every 100 Hours / 6 Months:
- Replace Fuel Filter: A fresh filter prevents debris from reaching the carburetor.
- Clean Spark Arrestor: For portable units, carbon buildup can restrict exhaust flow.
- Check Electrical Connections: Inspect all terminals for corrosion and tighten any loose connections.
- Every 200 Hours / Annually:
- Drain and Replace All Fluids: Engine oil and coolant (if applicable).
- Clean Fuel Tank: Inspect for rust or sediment and clean thoroughly.
- Perform a Load Bank Test: Especially critical for standby generators, this ensures the unit can handle its rated load without issues.
Advanced Procedures for Peak Performance
- Valve Lash Adjustment: Check and adjust valve clearances using feeler gauges (0.003-0.005″ intake, 0.005-0.007″ exhaust is typical). Incorrect clearance causes hard starting and power loss.
- Fuel System Preservation: For seasonal units, always add a product like Sta-Bil 360 Protection, then run the generator for 10 minutes to circulate the treated fuel before storage.
- Bearing Inspection: Check rotor shaft ends for play. More than 1mm lateral movement often indicates worn bearings that need replacement.
Storage Best Practices
Improper storage is a death sentence for many generators.
- Fuel Treatment: Fill the tank 95% full with treated fuel to minimize air space and prevent condensation.
- Battery Care: Disconnect the negative terminal and maintain with a smart charger if storing for extended periods.
- Moisture Control: Place moisture absorbers (e.g., DampRid) inside the control panel compartment.
- Rodent Protection: Install ultrasonic repellents or stuff steel wool into exhaust openings and air intakes to deter pests that chew wiring.
- Standby Generators: Perform monthly 30-minute test runs under at least 50% load to keep components lubricated and ensure readiness.
- Documentation: Maintain a log book of all maintenance activities. This is invaluable for troubleshooting, warranty claims, and resale value.
Safety First: Operating Your Generator Securely
While troubleshooting and maintenance are important, ensuring safe operation is paramount. Generators pose serious risks if not handled correctly.
Carbon Monoxide (CO) Risks – The Silent Killer
CO poisoning is responsible for over 400 generator-related deaths annually in the US.
- Mitigation:
- Placement: Always place your generator at least 20 feet from any building, with the exhaust pointed away from windows, doors, and air intakes.
- Technology: Consider models with CO-detecting automatic shutoff (like Generac’s COsense® technology).
- Deflectors: Use wind-directional exhaust deflectors to guide fumes away.
- Alarms: Install battery-powered CO alarms on every level of your home and low-level CO monitors (<30 ppm) for added safety.
Electrical Safety – Avoiding Shock and Damage
- Backfeed Hazard: NEVER "backfeed" power into your home by plugging the generator into a wall outlet (like a dryer outlet). This sends electricity back into the grid, posing a lethal risk to utility workers.
- Transfer Switches: Always use a professionally installed manual or automatic transfer switch (30A models are common for most homes) or an interlock kit to safely connect your generator to your home's electrical panel.
- Grounding: Properly ground portable generators using a copper-clad grounding rod. Even inverter generators with a "floating neutral" design require proper grounding for certain applications.
Environmental Impact Reduction
- Fuel Choices: Propane burns cleaner than gasoline (up to 50% less CO). Biodiesel blends (B20) can significantly reduce particulate matter in diesel units.
- Emissions Control: Regularly clean spark arrestors to maintain efficiency. Consider CARB-compliant models for lower emissions.
- Noise Reduction: Inverter generators (typically 53-58 dB) are substantially quieter than conventional models (often 68-72 dB), making them more neighborhood-friendly.
Diving Deeper: Advanced Diagnostics
For persistent or complex issues, these advanced diagnostic steps can pinpoint problems.
Compression Testing
Low compression leads to hard starting, misfires, and significant power loss.
- The Steps:
- Warm the engine for 10 minutes.
- Remove all spark plugs.
- Disable the fuel system (e.g., by disconnecting the fuel line or carburetor solenoid).
- Thread a compression gauge firmly into a cylinder.
- Crank the engine 4-5 revolutions.
- Record the reading.
- Interpretation: A healthy small engine typically shows 90-110 PSI, with less than 10% variation between cylinders. A "wet test" (adding 1 teaspoon of oil to the cylinder) that raises compression by 15-20% indicates worn piston rings.
Stator and Rotor Testing
For electrical power generation issues, testing the alternator's core components is vital.
- Stator Windings: Use an ohmmeter to check resistance between stator windings (should be 0.2-0.5Ω). Open circuits or significant resistance differences indicate a fault.
- Rotor Field Coil: Measure the resistance of the rotor's field coil (typically 10-25Ω).
- Diodes: Test the rectifier diodes for proper forward (0.3-0.7V) and reverse (open loop) bias.
Fuel Injection System Diagnostics (for EFI Generators)
Electronic Fuel Injection (EFI) systems are more complex than carburetors but offer better fuel efficiency and emissions.
- Fuel Pressure Test: Connect a fuel pressure gauge to the fuel rail. Expect 35-45 PSI.
- Injector Pulse Test: Use a noid light to verify that the fuel injectors are receiving a pulse from the ECU.
- Error Code Retrieval: Many EFI systems store error codes. Consult your operator’s manual for blink patterns or use an OBD scanner if available.
- Tip: Use dielectric grease on all EFI connectors to prevent corrosion. A graphing multimeter can help diagnose intermittent electrical issues by showing fluctuations over time.
Advanced Load Testing
Beyond just plugging in appliances, systematic load testing provides deep insights.
- Process: Gradually apply load in 10% increments up to 100%.
- Monitoring:
- Voltage Drop: Should be ≤5% at full load.
- Frequency Stability: Maintain 58-62Hz.
- Exhaust Gas Temperature (EGT): Monitor with an infrared thermometer (800-1100°F at full load is typical).
- Further Analysis: Consider infrared thermography to identify overheating components or professional oil analysis (quarterly lab tests for wear metals; iron >100ppm indicates bearing wear) for persistent internal issues.
Maximizing Performance & Longevity: System Optimization
Once you've tackled the common problems, you can optimize your generator for better efficiency (often 15-30% improvement) and extend its lifespan by thousands of hours.
- Performance Tuning:
- Air-Fuel Mixture: Fine-tune the mixture screw (1/8 turn increments) for optimal combustion, which can yield 5-10% better fuel economy.
- Governor Droop Setting: For standby units, fine-tune the governor droop (3-5% is typical) for precise frequency stability (±0.5Hz).
- Voltage Regulator Calibration: Calibrate the voltage regulator to exactly the nameplate voltage (e.g., 120/240V ±2%) for optimal appliance performance.
- Advanced Cooling System Enhancements:
- Auxiliary Oil Coolers: Essential for units operating in ambient temperatures above 90°F.
- Thermal Imaging: Perform quarterly thermal imaging scans to identify localized hotspots before they become critical failures.
- Coolant Additives: Use water-wetter solutions to improve heat transfer by up to 20% in liquid-cooled units.
- Load Management Strategies:
- Balance Single-Phase Loads: Keep loads balanced within 10% of each other across phases to prevent overheating and maximize efficiency.
- Sequence Heavy Starts: Stagger the startup of heavy motor loads with 30-second delays to avoid excessive surge demands.
- Optimal Loading: Maintain your generator at 30-80% of its rated capacity for optimal fuel efficiency and lifespan. Avoid "light loading" for extended periods, which can lead to carbon buildup.
- Predictive Maintenance Technologies:
- Oil Analysis: Quarterly lab tests for wear metals (e.g., iron >100ppm indicates bearing wear), coolant contamination, and fuel dilution.
- Vibration Analysis: Identify imbalance or bearing wear before audible symptoms appear.
- Infrared Scanning: As mentioned, a quick scan can reveal thermal anomalies.
- Quality Assurance Protocols (After Major Service):
- 72-Hour Burn-In Test: Run the generator at 50% load for 72 hours to ensure all components are seated and operating correctly.
- Step-Load Test: Apply load from 0-100% in 25% increments to verify rapid response and stability.
- Harmonic Distortion Measurement: Ensure Total Harmonic Distortion (THD) is below 5%, especially for sensitive electronics.
- Automatic Transfer Switch (ATS) Cycle Testing: For standby units, verify a minimum of 10 successful transfer cycles.
- Redundancy: For mission-critical applications, consider N+1 redundancy (parallel generators) with automatic load sharing. Document all optimization procedures.
Keep Your Cobblestone Flowing: A Call to Action
A well-maintained and properly operated generator is a valuable asset, ensuring your systems run reliably, whether you're powering essential tools or automating your virtual world's resource gathering. The key to avoiding most headaches lies in diligent preventive maintenance, understanding the basic principles of operation, and addressing minor issues before they escalate.
Don't wait for a complete breakdown. Regularly check your fuel, inspect your spark plug, keep an eye on oil levels, and listen for any unusual sounds. By adopting a proactive approach and following these troubleshooting steps, you'll not only extend the life of your generator but also ensure a consistent, worry-free supply of blocks and power, whenever you need it most. Stay safe, stay powered, and keep those cobblestones generating!